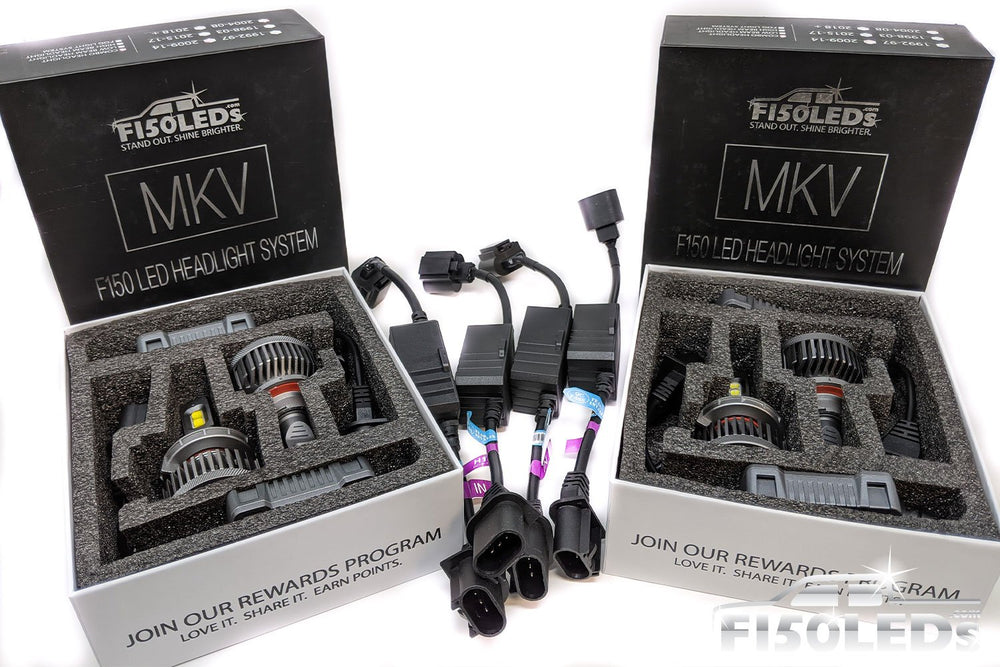


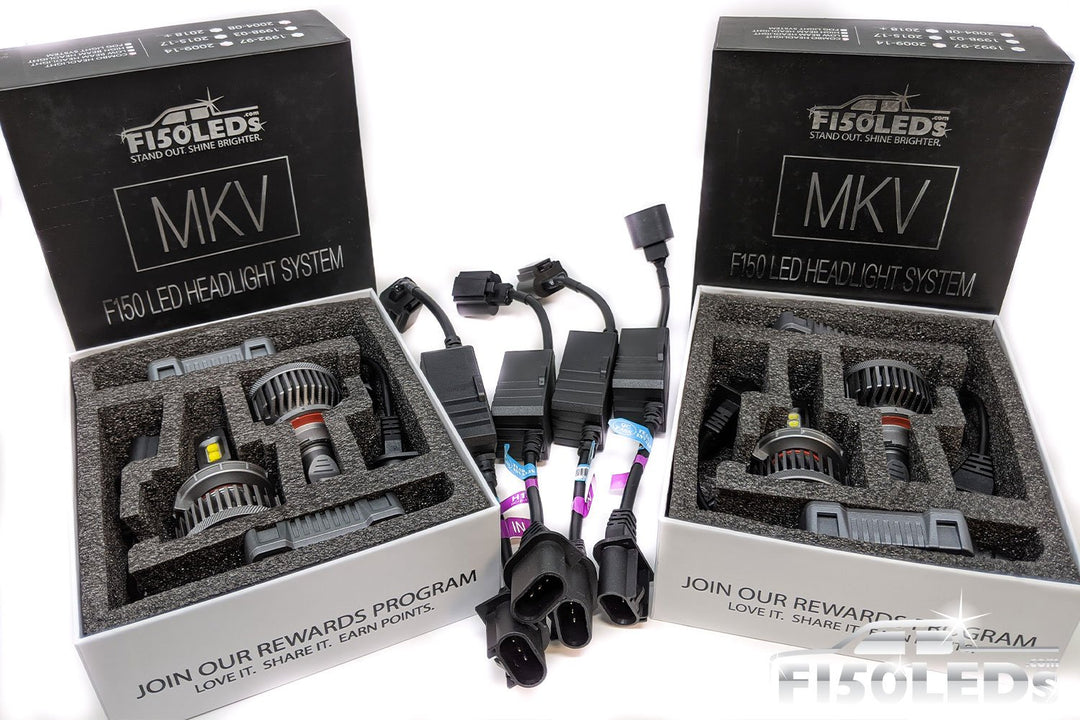


If you want the absolute best for your Ford Super Duty headlights then you have found it!
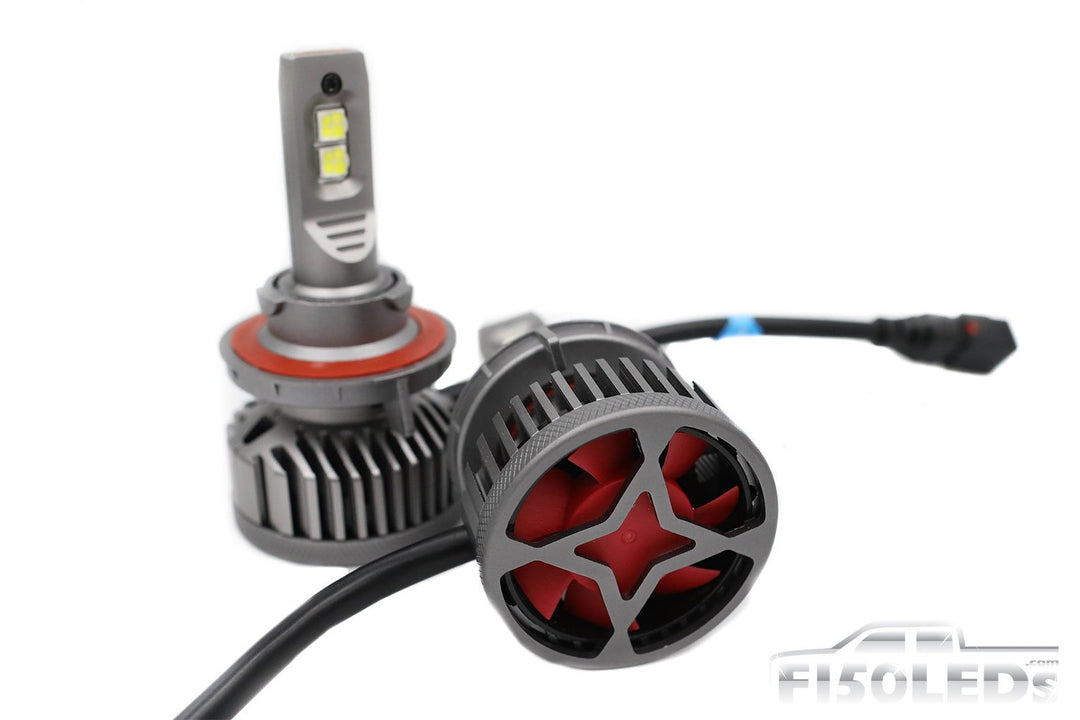
Now upgraded with QUAD CREE 50.2 XHP Chips for increased lumen and optical performance!
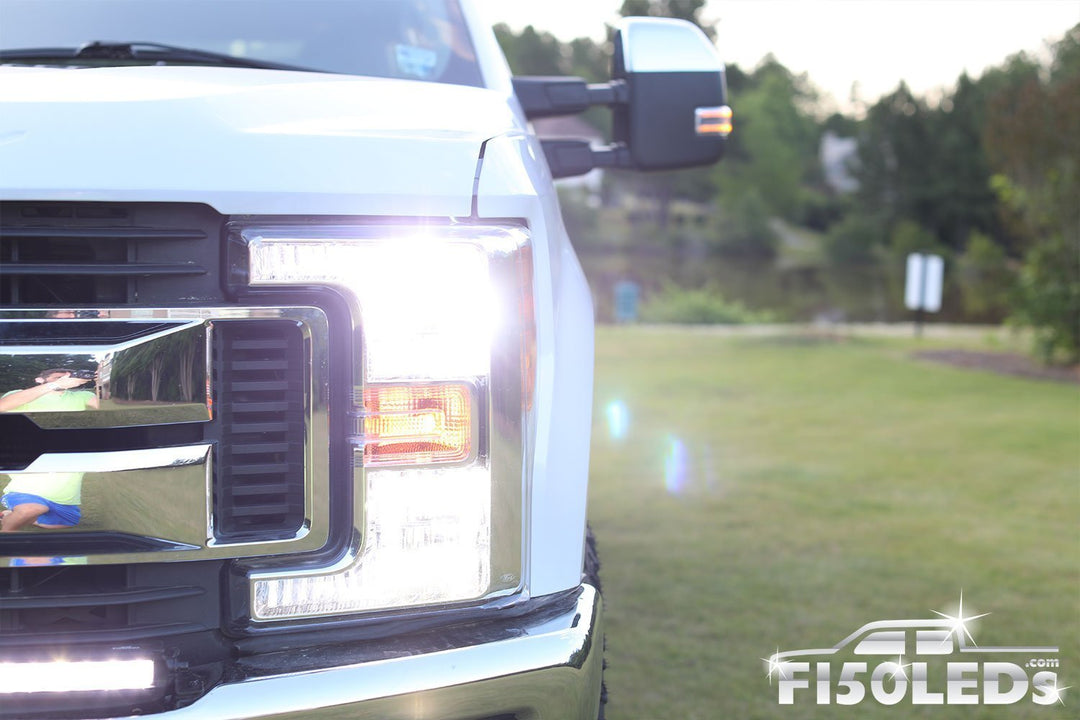
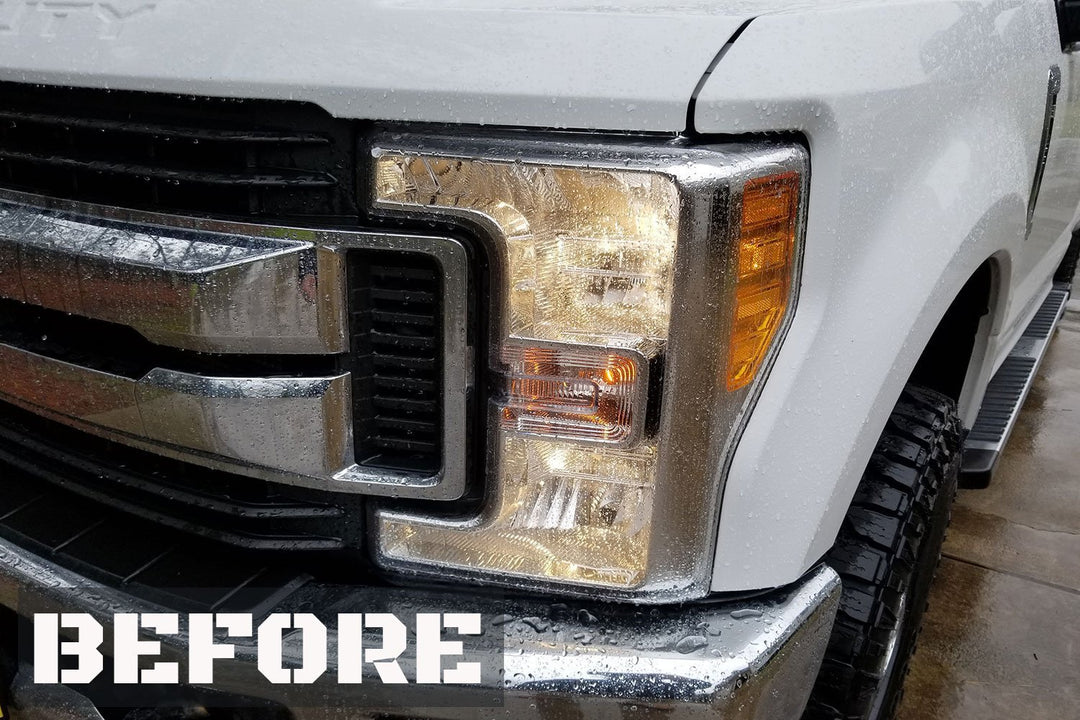
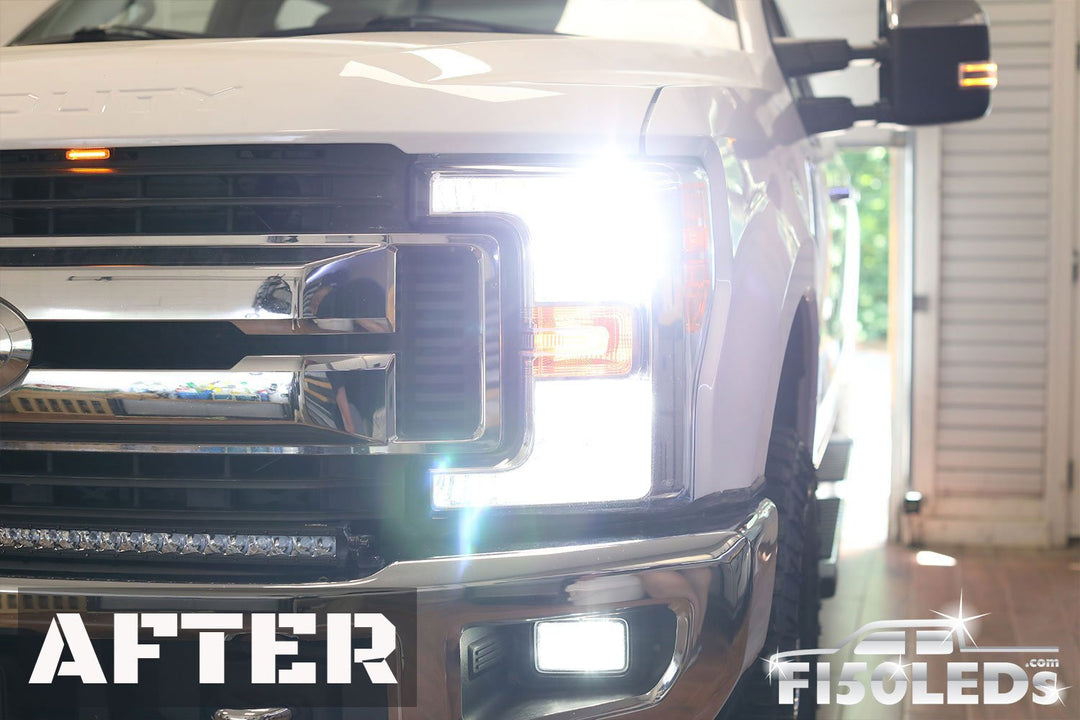
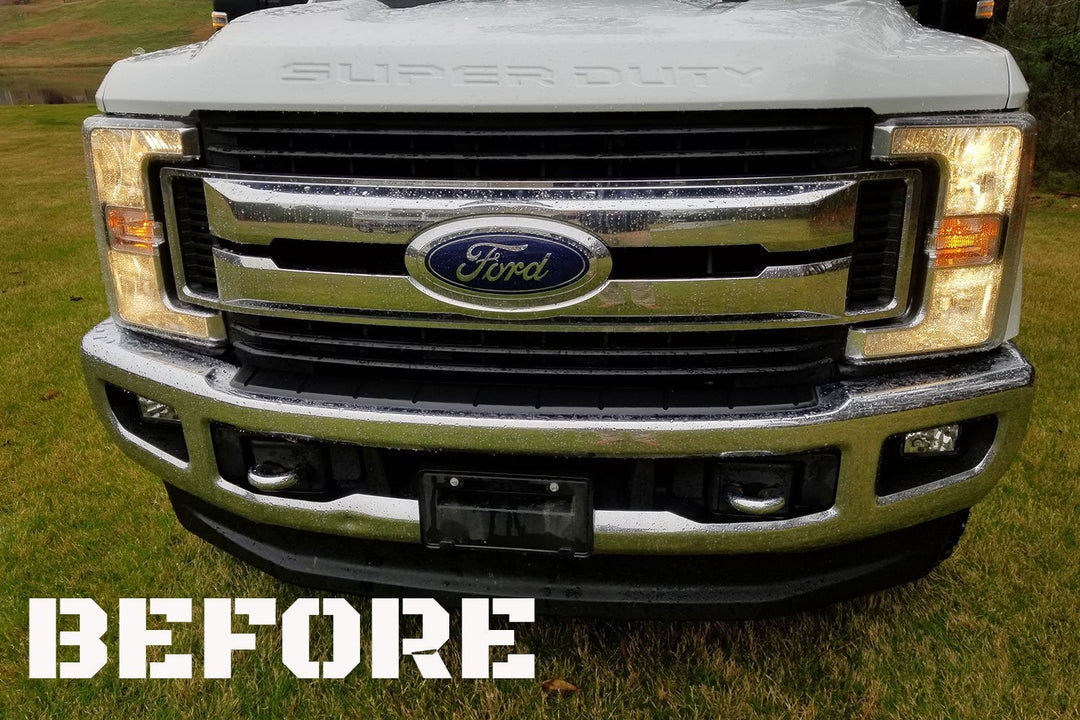
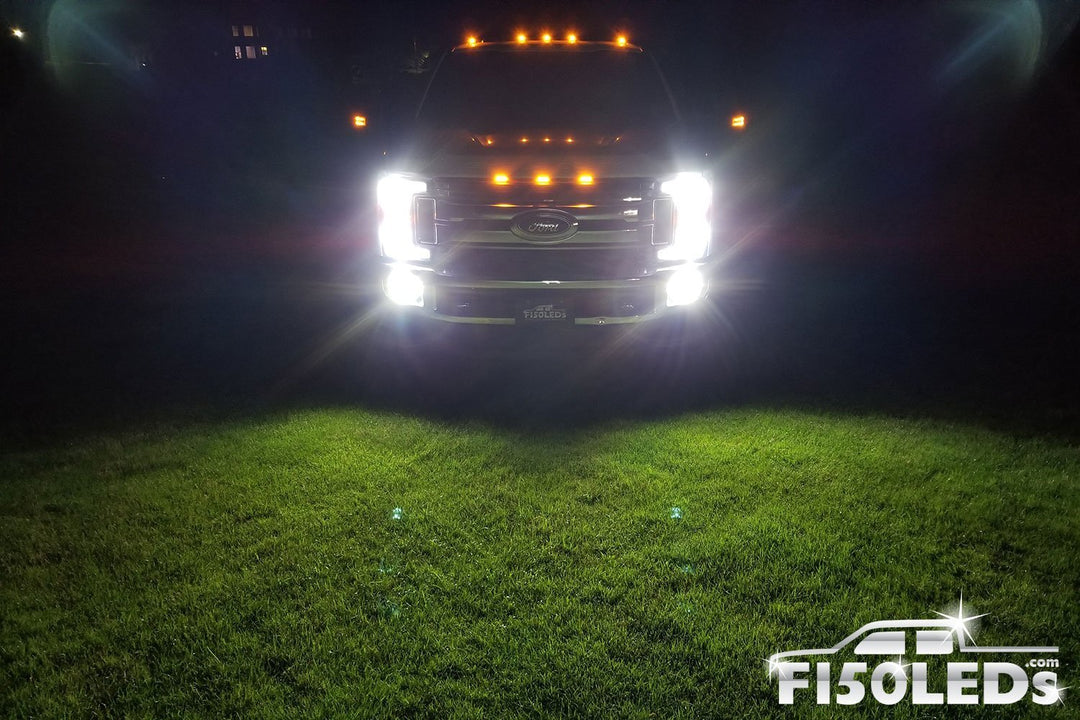
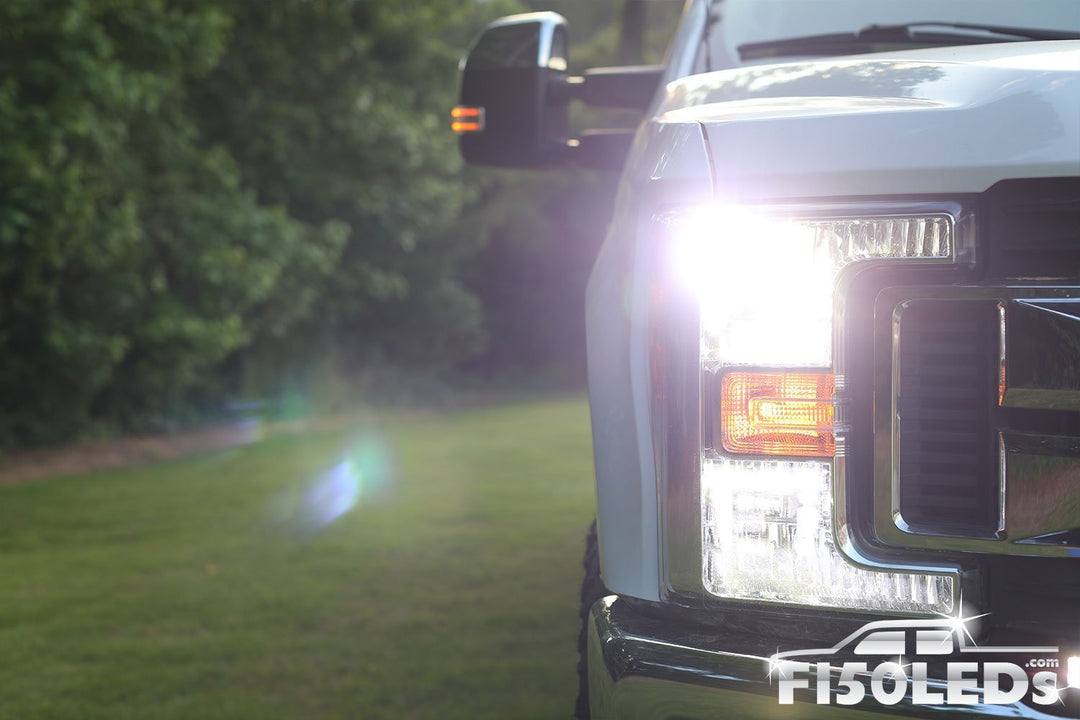
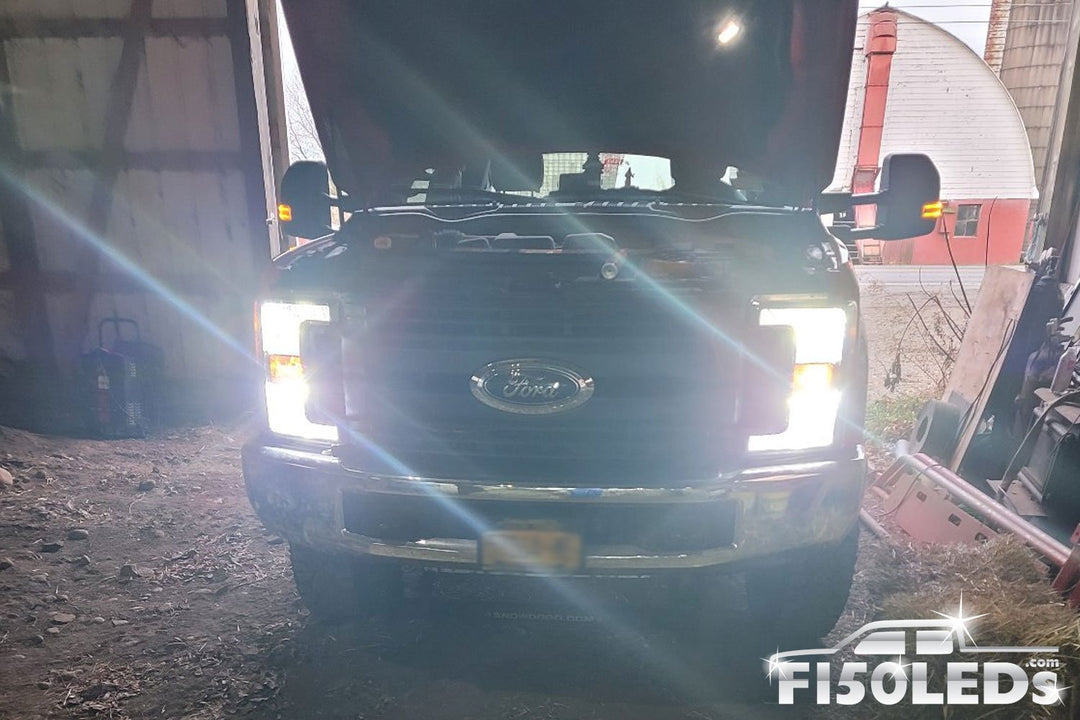
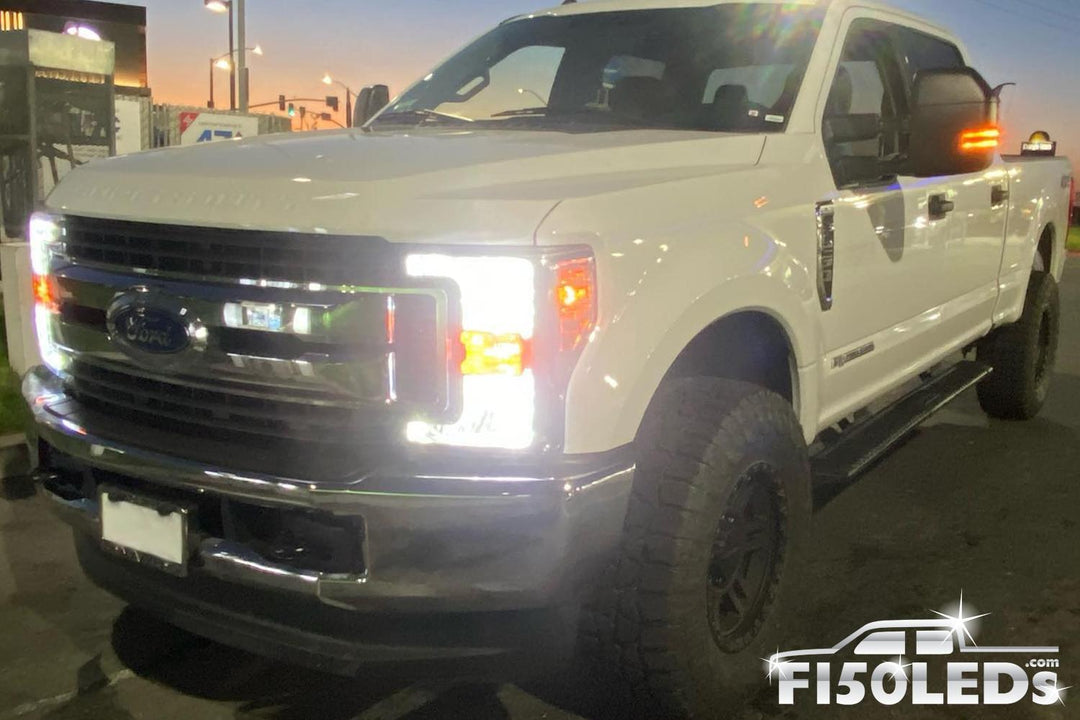
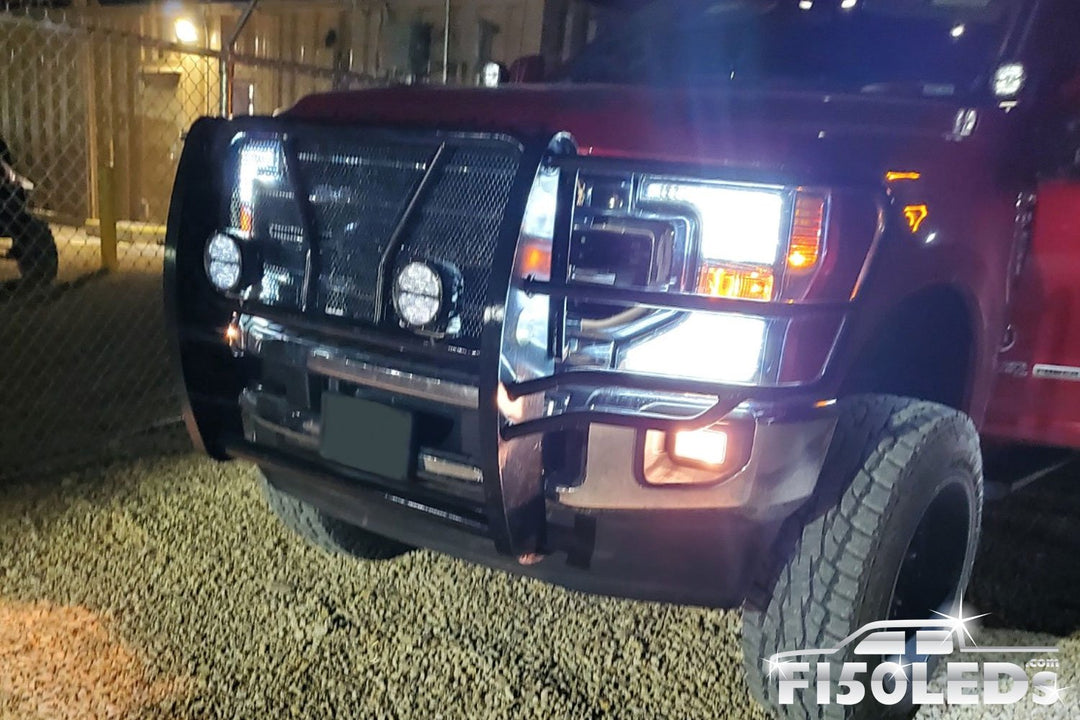
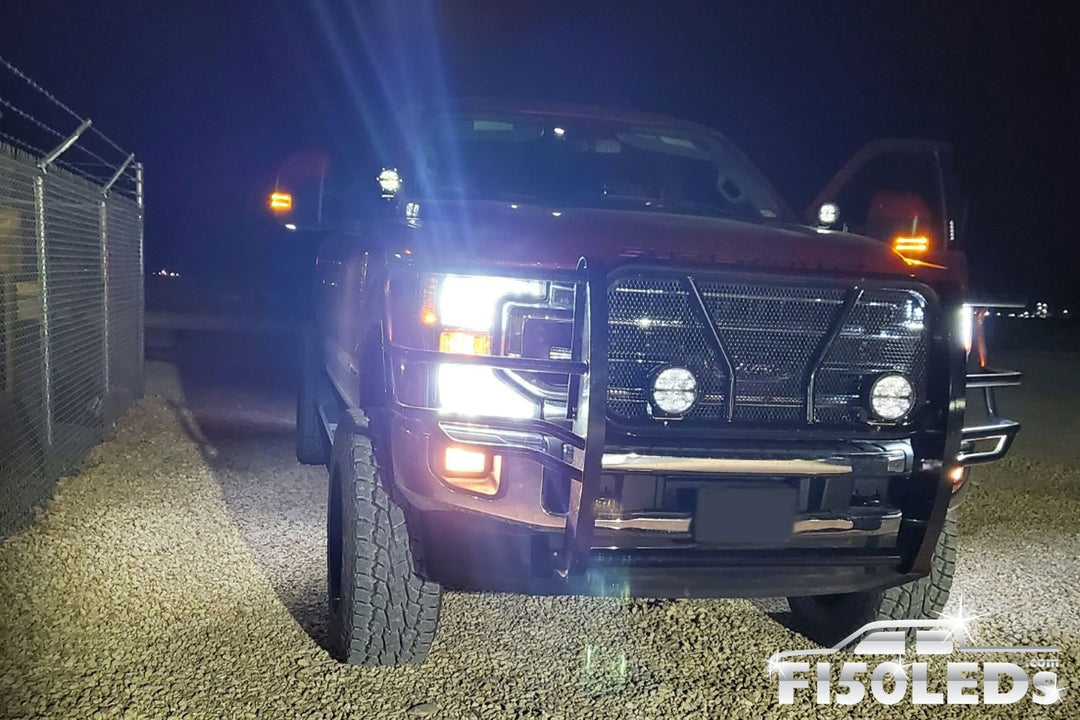
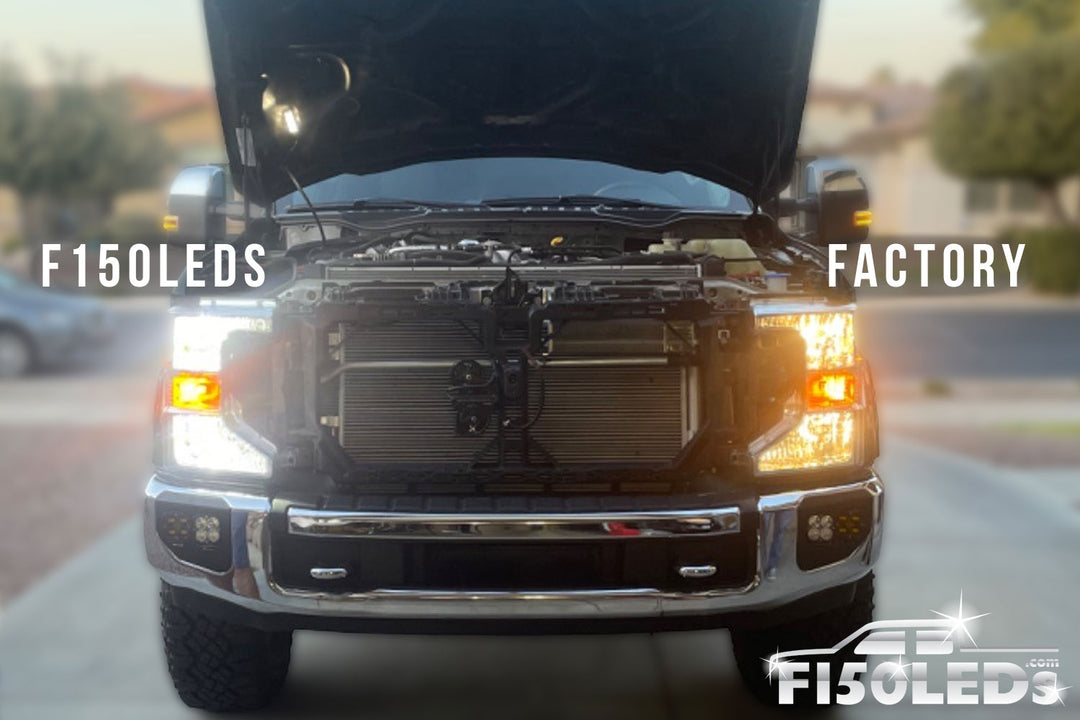
Your vision at night is critical to your safety as well as to the safety of those around you. Don’t suffer through the dim & dingy factory halogen headlights. With our custom-built MKV CREE LED headlights your 2017-2022 F250, F350, F450 Super Duty will be lighting up the night like never before and will look good doing it!
We love using the MKV system in our Super Duty's and we guarantee you will too!
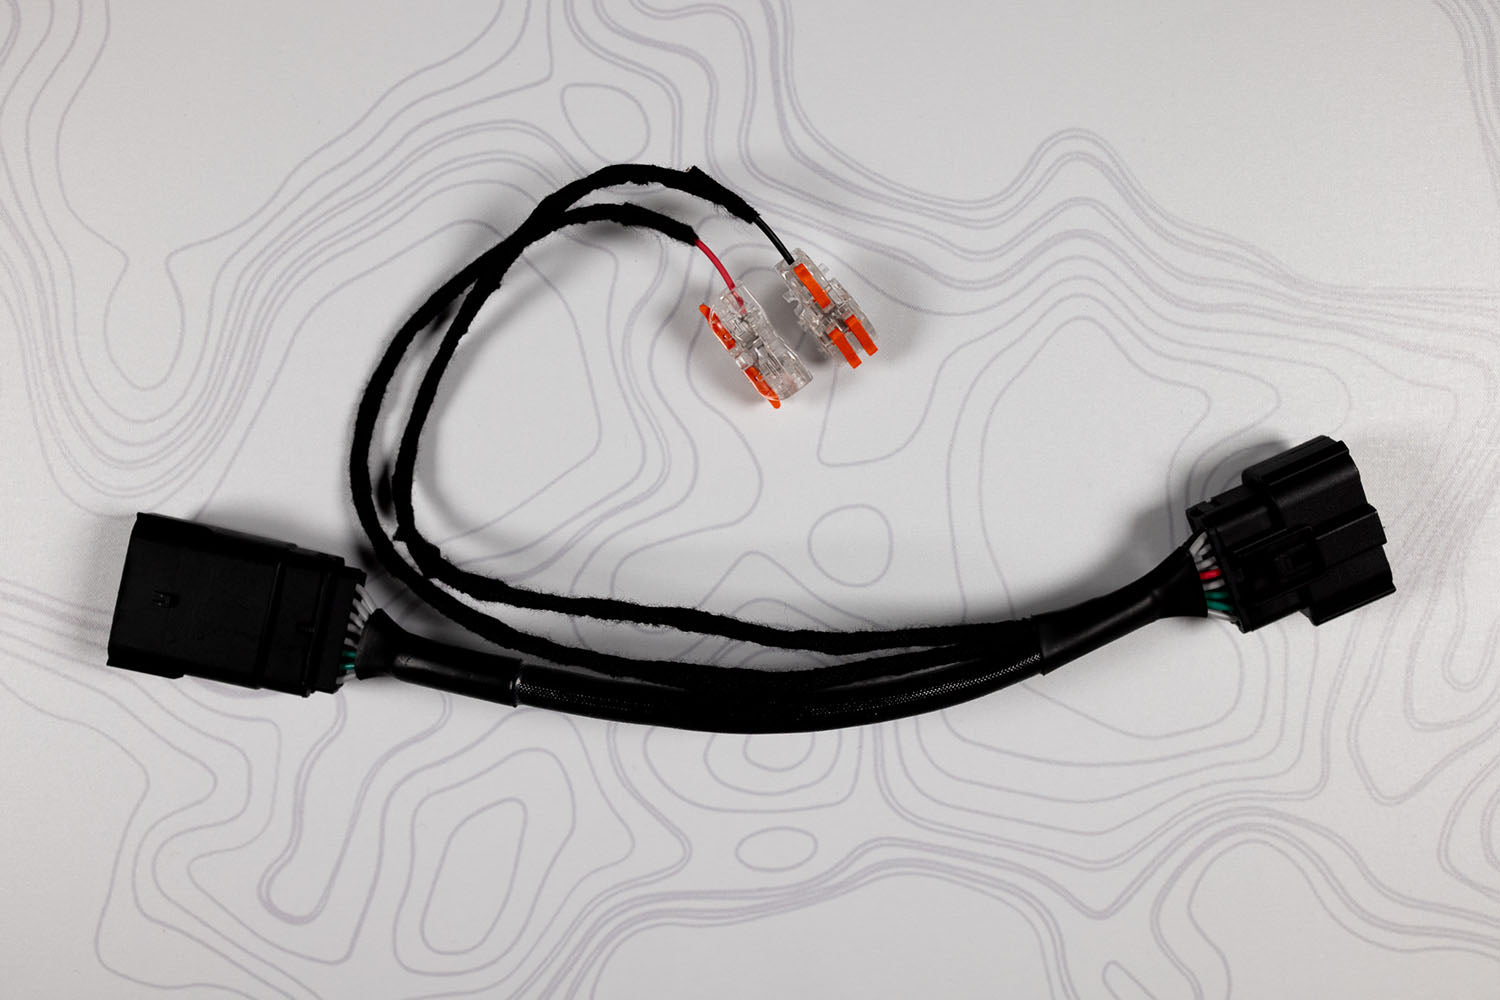
The MK5 system provides you with the absolute brightest LED headlights available with a focused (and adjustable) pure white beam pattern, a fully enclosed operating system to protect against moisture, etc, advanced heat dissipation technology, aircraft-grade aluminum construction, advanced intelligent temperature modulation, and CANBUS compliant drivers.
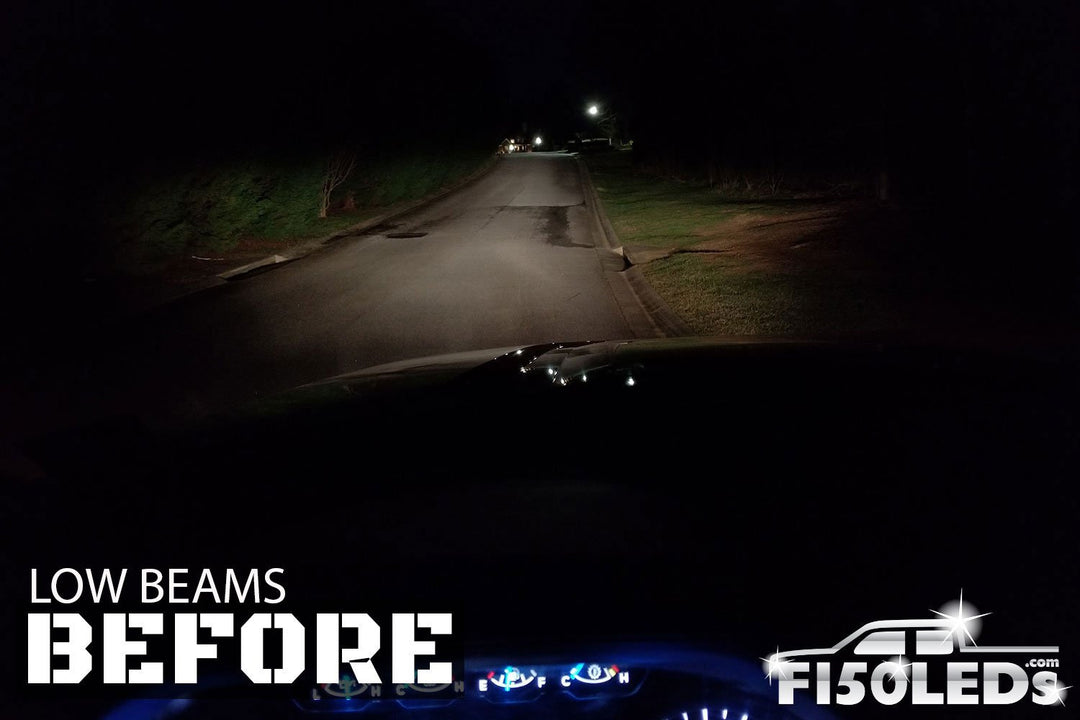
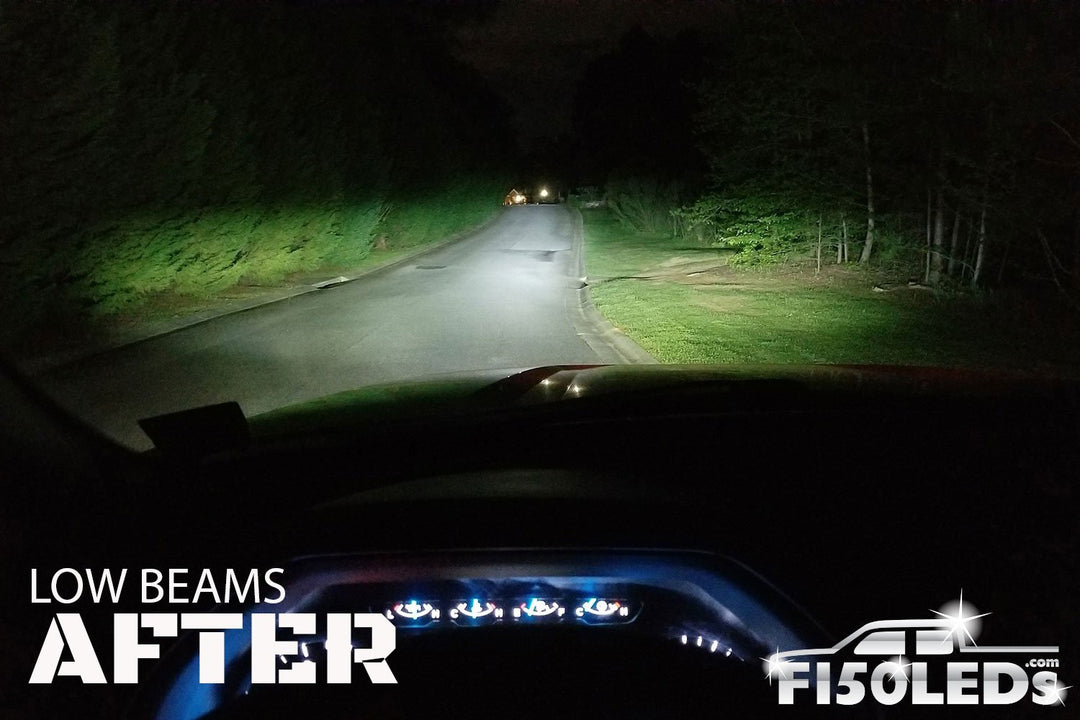
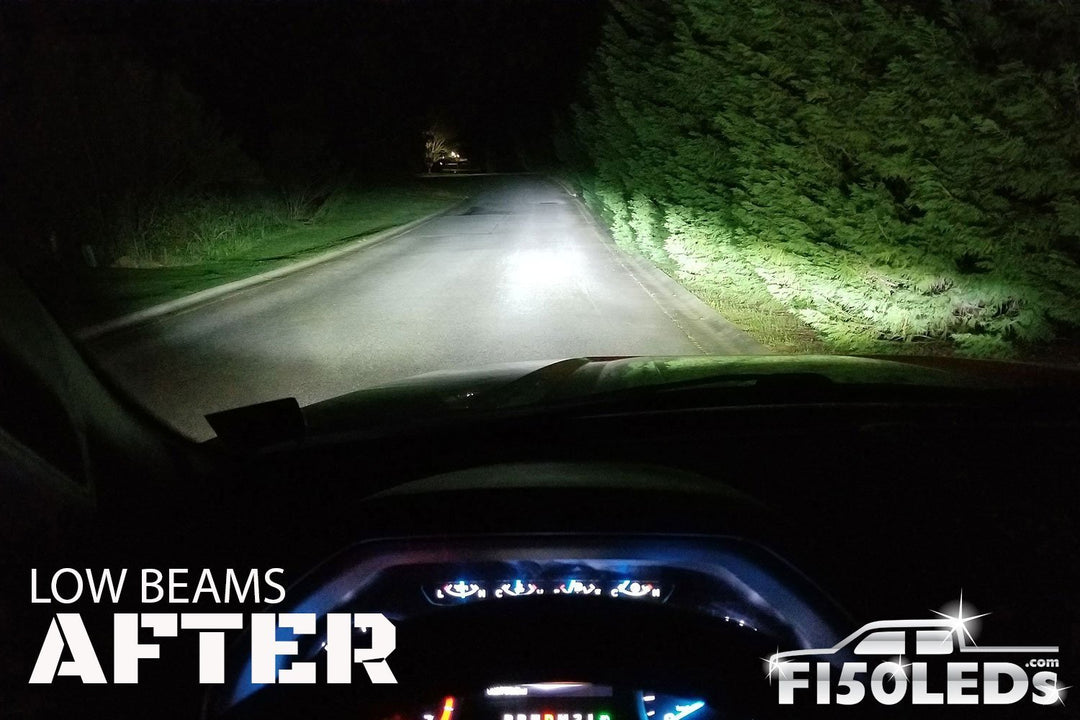
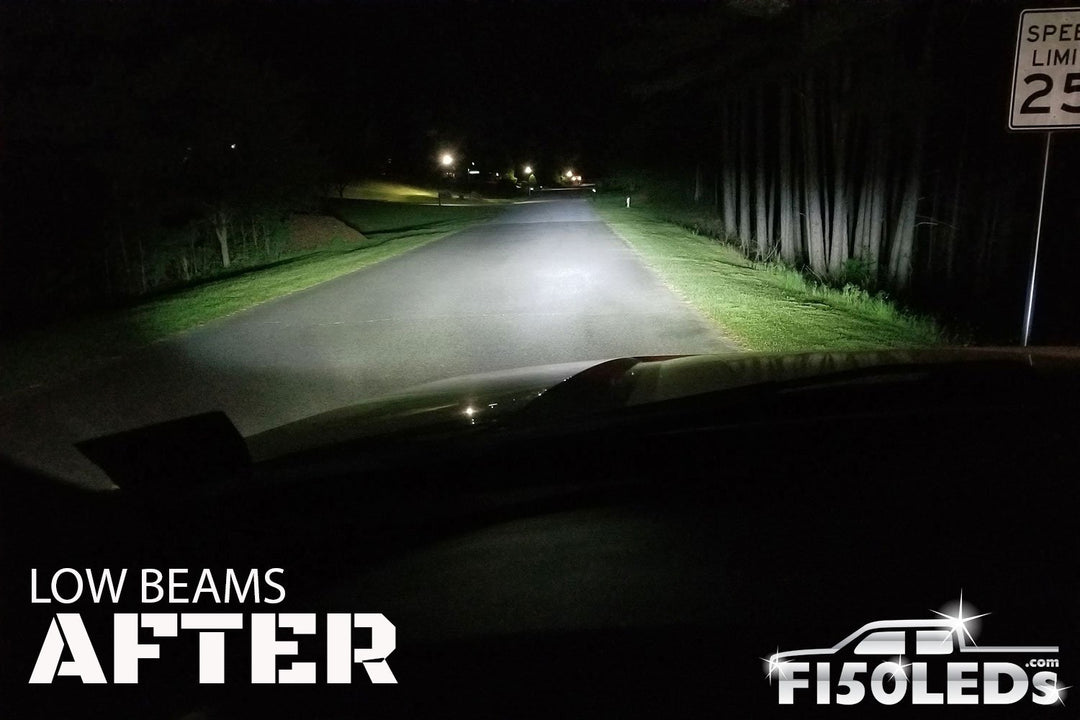
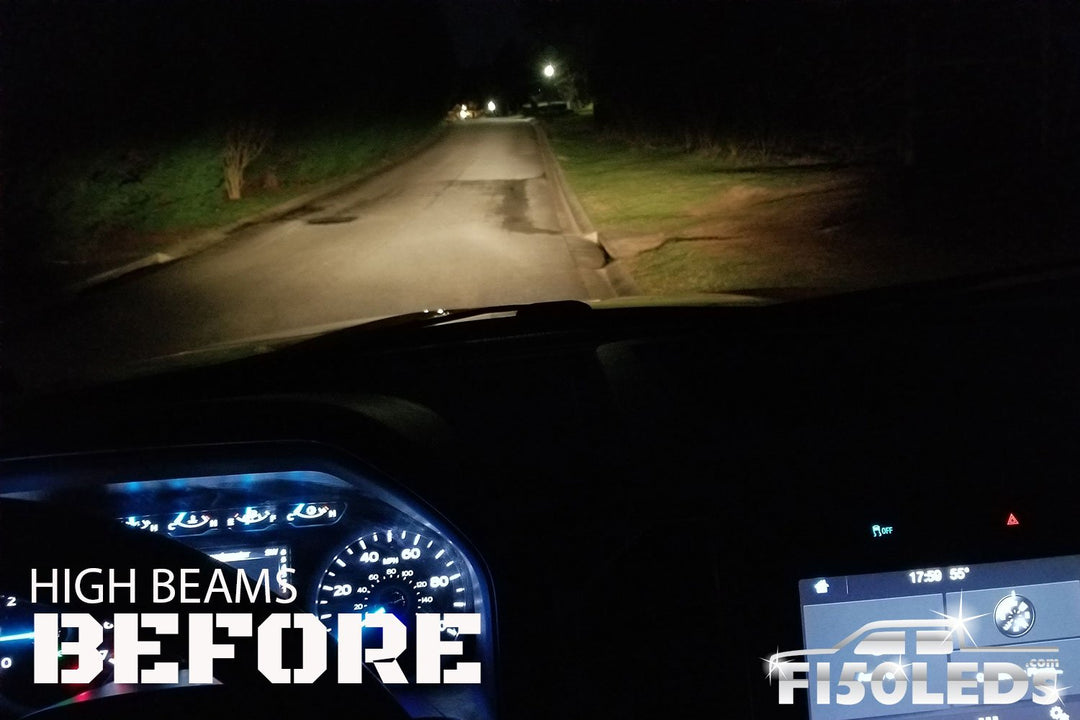
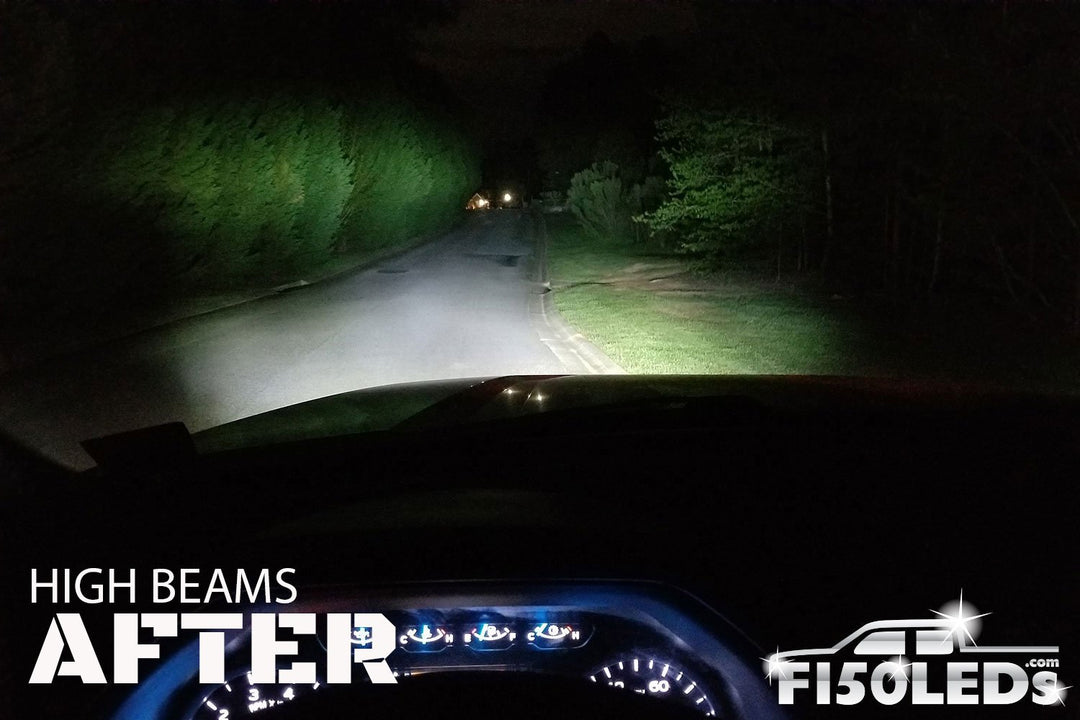
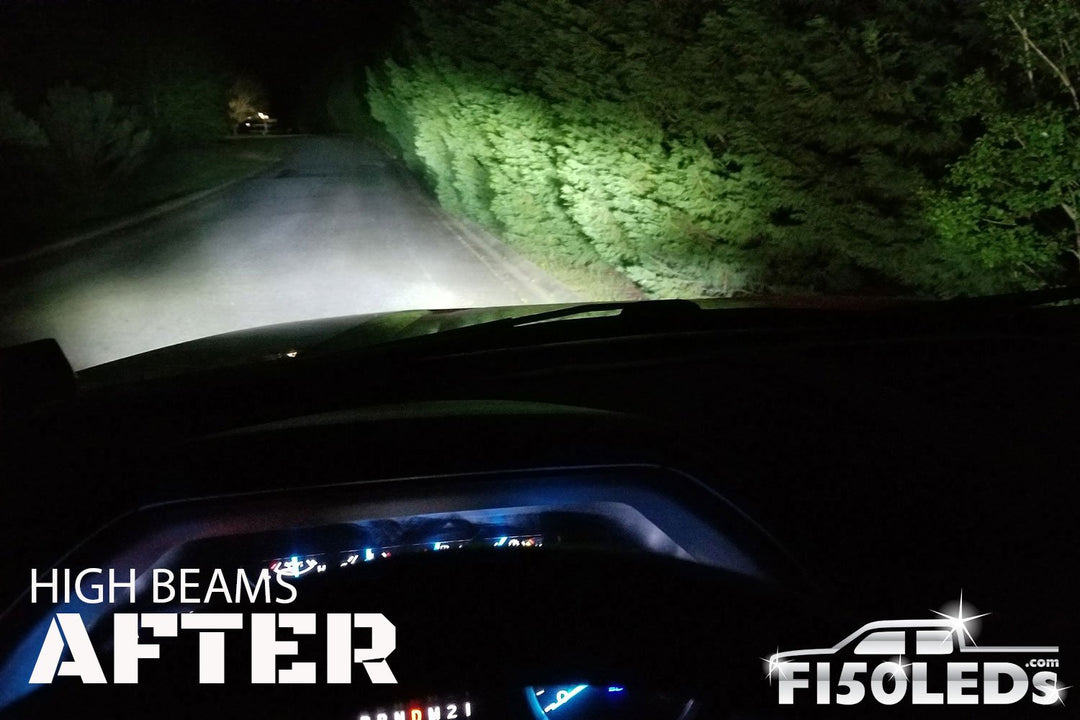
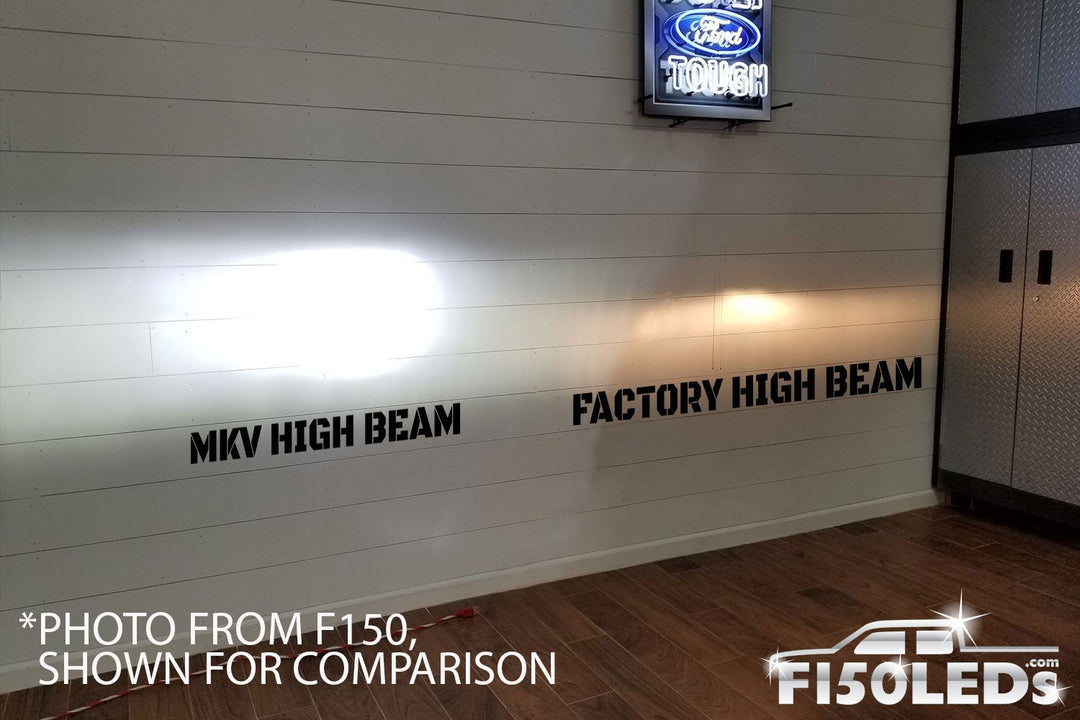
With our Super Duty design we focused primarily on low beam performance because that is what gets used in most situations and AUX lighting can be used to further augment high beam lighting situations. The high beams are still an obvious upgrade but you will notice the largest increase to your Super Duty lighting performance will come to your low beams function.
Your vision at night is critical to your safety as well as to the safety of those around you. Don’t suffer through the dim & dingy factory halogen headlights. Stand out, shine brighter and light up the night with our premium Super Duty LED MKV headlight system custom-built for your Ford Super Duty today! Not compatible with factory HID or Factory LED headlamps.
California Residents - Warning: California's Proposition 65
WARRANTY: each and every product we offer includes our Full 1-year warranty!
![]() 2017-2022 Super Duty Headlight Installation Guide
2017-2022 Super Duty Headlight Installation Guide
![]() 2017-2022 Super Duty Voltage Control Unit Installation Guide
2017-2022 Super Duty Voltage Control Unit Installation Guide