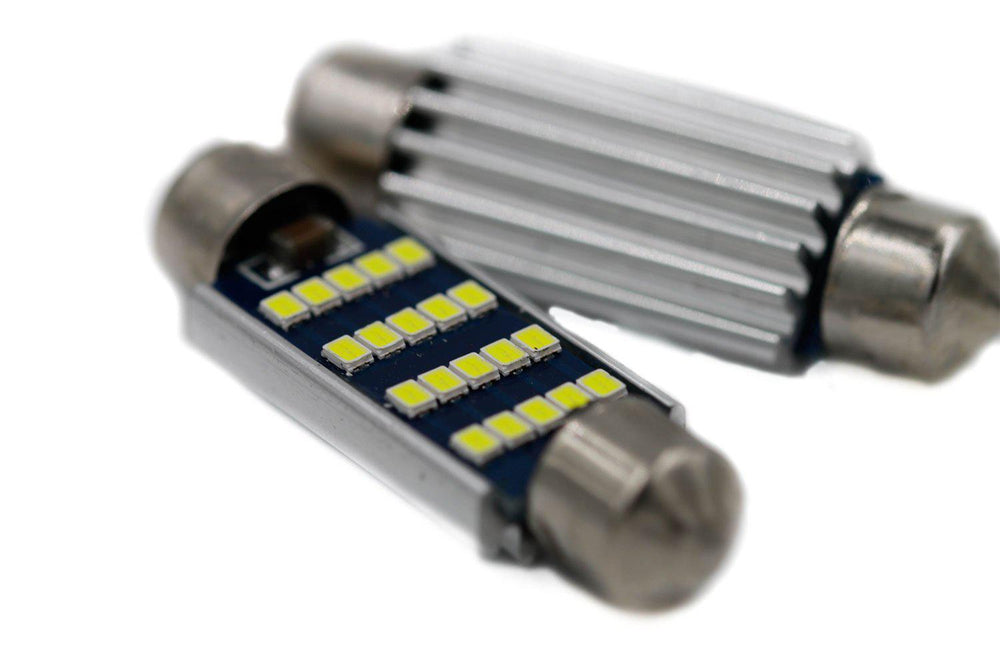
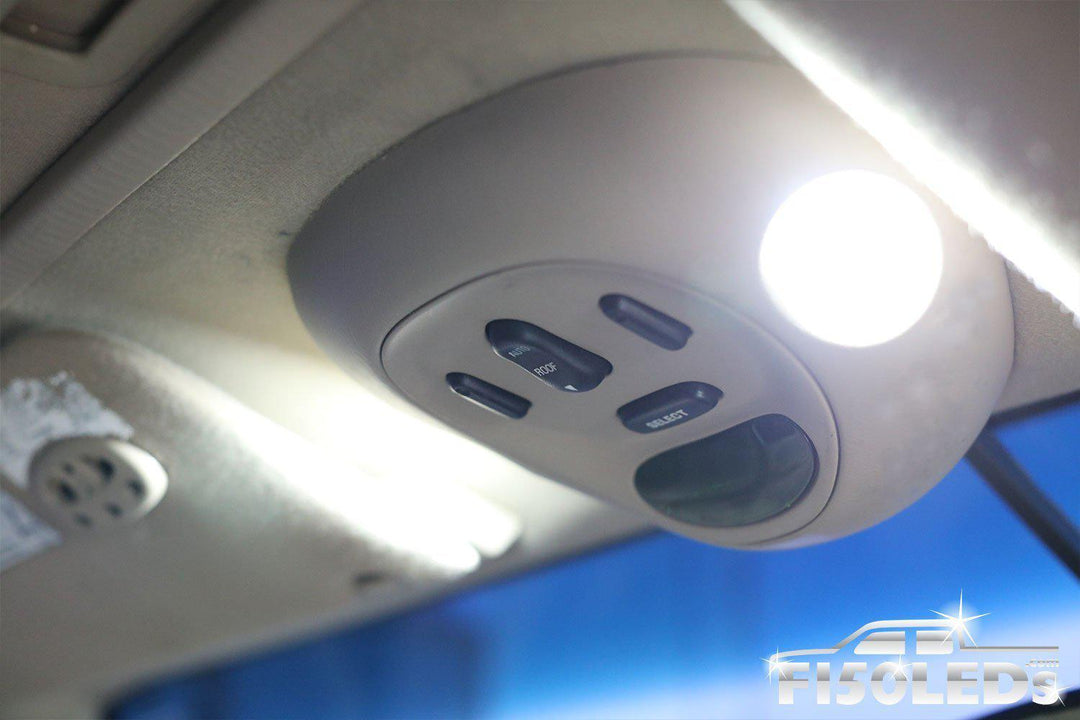
×
Hey guys, it's Nick and Adam here from F150LEDs.com. Today we just want to take a moment to show you how to install some awesome interior front map lights here on a 1998-03 Ford F-150. Definitely improves your F-150 experience, simple to install, and we're going to show you how it's done right now.
To remove our front map assembly, we're going to either need to take a pry tool or maybe a flathead screwdriver. You can even take your hands and just pry them up under your front map assembly. Once you do that, we're going to apply some slight pressure, then our pop tabs will release from the truck.
After we've done that, there is a factory wiring harness that's connected to our assembly right here. We're just going to pull away from this. It should pop right out and now we're ready to move on to our next step.
Now that we've exposed the back of our front map assembly, we have access to four Torx head screws that are located right here. So we're going to take a size 10 Torx head driver. Go ahead and remove these screws, like so. Once you remove these screws, that'll give us access to our bulb.
So we currently have our MKI bulb installed right now. We're going to go ahead and remove this bulb and install our highly upgraded MKII bulb, which is twice as bright as this current bulb.
Now to remove this bulb, you're going to need a small pair of needle nose pliers or maybe you can use your Torx head screwdriver, maybe a flathead, but apply some slight pressure from behind the bulb and they'll pop right out of those tabs and you can pull the bulb out. You want to be very careful if you're removing an OEM bulb, as you don't want to apply too much pressure and cause the glass to break.
So now that we have our MKI bulb out, we're going to take our MKII bulb and just line it up with these tabs. Once you have it aligned up, just apply some pressure down and you should hear the bulb click into place. Now that the bulbs clicked into place, with our LEDs facing up, we're going to take our assembly, just go ahead and line up our holes and re-insert our Torx said screws.
Now that we've re inserted these screws, you want to tighten these back down and then we'll go and do the same thing for the other side of the assembly and we're ready to reinstall our assembly back into our truck.
Now that we have our MKII front map bulbs installed, we're ready to put our front map assembly back into place. So all we're going to need to do is reinsert your connection, click it into place and you can see both of our bulbs light up. Now the camera might not do it justice right now, but these bulbs are going to vastly improve your vision inside your truck at night.
We're going to line our tabs back up with our holes, apply some pressure and it'll fit right back into place and we're good to go.
Thanks Adam. These things look awesome. They are extremely bright. The camera can't capture how bright and how good these things look but they definitely will give you an upgraded interior aesthetic look plus they're going to make everything more functional because you're going to be able to see what you're doing. These things are even bright enough to light up the floorboards.
So highly recommend them for your 98- 03 Ford F-150. They're an excellent upgrade. You can check them out at F150LEDs.com, where you'll find all of our great LED line of products for your Ford F-150.
We truly appreciate your support. Be sure to click the subscribe button below to stay up to date with the latest and greatest LED products for your Ford F-150. Thanks guys. We'll see you at F150LEDs.com.