


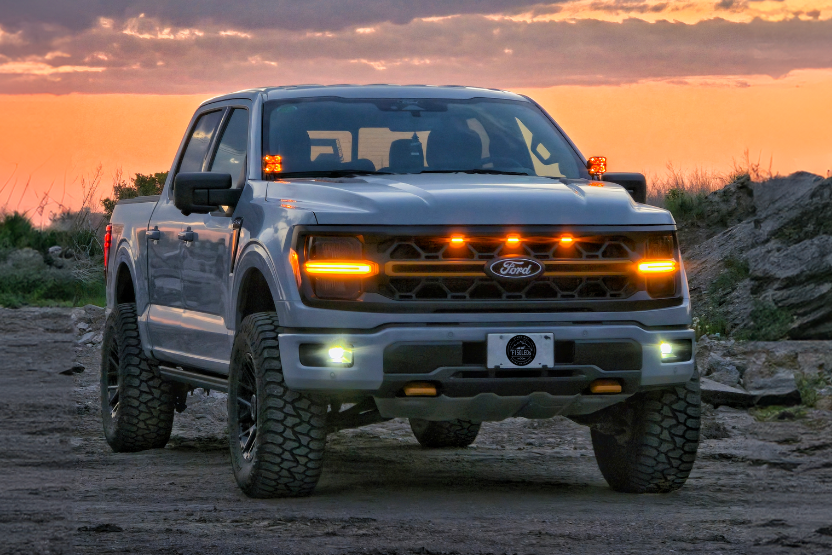
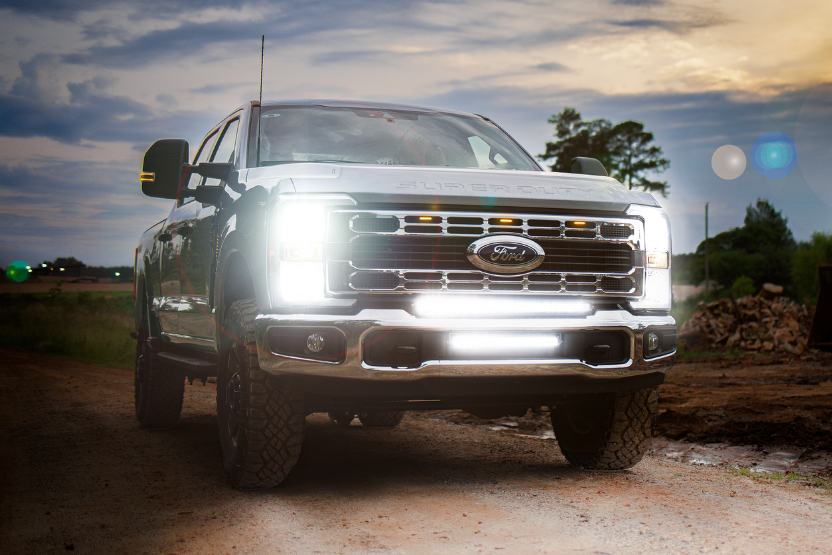
Equipped with CREE XM-L2 LED Chips, the patent protected Spartan MKII LED Auxiliary Lights are available in dual (20W) or quad (40W) beam configurations with three total internal reflection (TIR) lens optics to choose from, custom amber LED backlighting, IP68 extreme build quality, thermal braided custom harnesses compatibility and two different beam color outputs to choose from: Pure Diamond White or Hyper Optic Yellow. Whether you're utilizing your Spartan Series for hood lights, fog lights or reverse lights, these Spartans are designed to impress in every way both on and off the trails.
The Spartan MKII Series are built to the highest of standards utilizing premium aircraft grade steel, thermal die-cast aluminum & high grade polycarbonate 93% transmittance lensing. The IP68 weatherproof sealed bodies feature large die-cast cooling fins for superior heat dissipation with electrophoretically heated & powder coated exteriors for extreme impact & UV resistance.
The Spartans blacked-out brackets are custom milled from aircraft grade stainless steel and feature 115° of vertical aiming adjustability (52° for DUO). Each Spartan MKII assembly features dual laser engraved American flags (with stars leading the way!) as well as the powder coated discrete 'SPARTAN' molding on the front cap. Matching harness kit included.
The ultimate light demands the ultimate LED performance chip. CREE, the world's authority on high quality led chip manufacturing, is the only USA chip manufacturer we trust to deliver ultimate performance for our Spartan Series lineup. The CREE XM-L2 chip is superior to any other 10W chip available in the world. Its ultimate performance, efficiency, clarity & reliability take the Spartan II series to a level not yet seen before in the auxiliary lighting world. If you don't have CREE, you don't have the best.
Cree LED XLamp® XM-L2 LEDs are high-performing single-die LEDs, delivering breakthrough lumen output and efficacy in the XM package. These LEDs build on the unprecedented performance of the original XM-L by increasing lumen output up to 20% while providing a single die LED point source for precise optical control. Built on the SC3 Technology™ Platform, XM-L2 LEDs are available with CRI (color rendering index) levels as high as 90 CRI.
The XM-L2 LED offers the unique combination of high efficacy and high lumen output at high drive currents, delivering an unprecedented 1198 lumens per single chip (4792 lumen per quad, 2396 lumen per duo) at 116 lumens-per-watt efficacy at 3A, 25°C. XLamp XM-L2 10W LEDs are the ultimate choice for lighting applications such as the Spartan MKII Series.
To harness the power of the CREE XM-L2 chips the Spartan MKII Series lights utilize custom TIR optics. TIR optics allow us to control the power of the CREE XM-L2 chips to project the light in a desired beam pattern as well as eliminate wasted light refraction. Our custom clear polycarbonate TIR optics achieve a 93% transmittance rate meaning they are able to utilize almost all of the light created by the CREE XM-L2 chip without any light transmittance loss issues.
Each Spartan will be custom tailored to your needs based on your TIR optic selection. Our TIR optics are also designed to be interchangeable in case your needs ever change later down the road and you decide you would like a different optic or color choice.
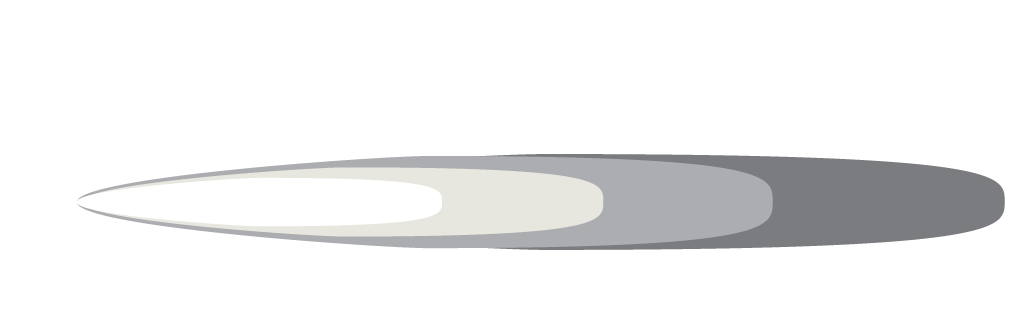
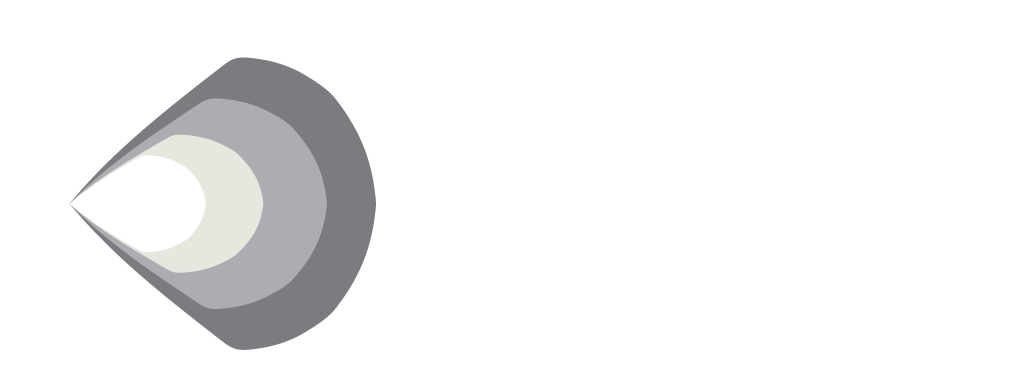
The Spot Lens is designed for those requiring a tight beam focus and extreme long range vision. It is ideal for faster driving conditions and where side vision is not as critical. This lens produces a 10° circular beam pattern for maximum down range vision.
The driving Lens is designed to give you a low but wider field of view light output while maintaining a sharp cut off line. This lens produces a 17° by 11° rectangular beam pattern which is ideal for most general driving conditions. SAE standards require the sharper cutoff line to prevent hindering vision of others. To maintain this safety standard the lights need to be mounted low to the ground, such as a fog light application.
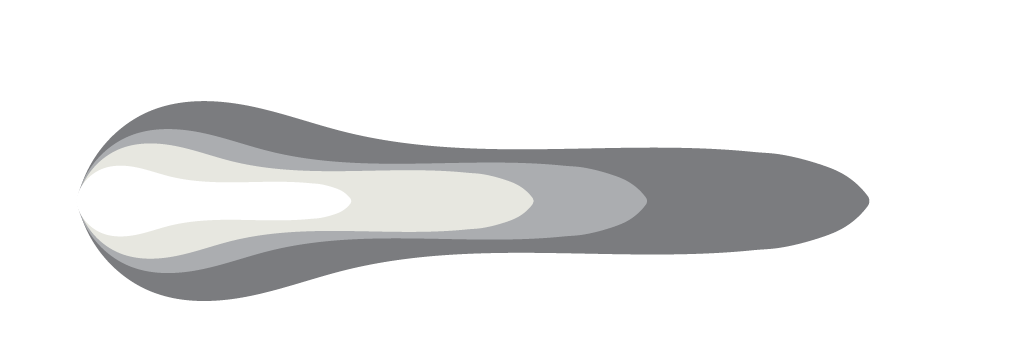
For ultimate near field vision, the UST is an optimal choice for reverse lighting, low mounted front fog lighting and side facing ditch lights. This lens delivers a wide angle 65° by 65° degree output pattern.
When selecting a clear lens the pure white light from the CREE XM-L2 chip will pass through as originally created and will output in that same diamond white color. The purity of the CREE XM-L2s diamond white light paired with our polycarbonate high transmittance lensing is unmatched. Definitely the choice for those wanting to keep a pure white beam output and wanting to have their lensing look slightly less aggressive. Even with a clear lens, you will still maintain the custom amber backlighting option.
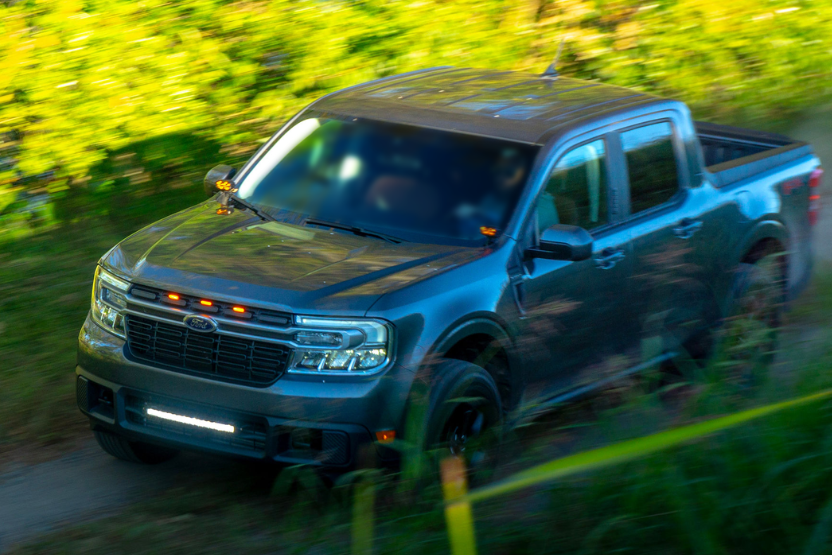
When selecting an amber lens, the diamond white light from the CREE XM-L2 will be filtered through an extreme amber resulting in a high performance Hyper Optic Yellow light output. Hyper Optic Yellow Output is designed to enhance visibility in challenging driving conditions like fog, snow, rain, and dust. Hyper Optic Yellow also reduces glare and boosts contrast, ensuring you can see more clearly in any adverse condition. Hyper Optic Yellow delivers a more unique color output, as well as a more aggressive amber look to the lens when the lights are off, both of which can further add to their aesthetic impact and help your truck stand out from the rest!
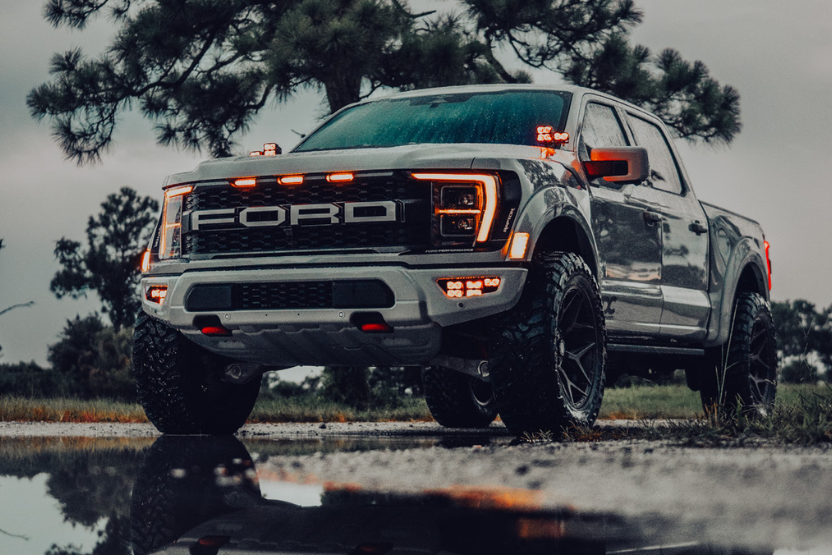
Each Spartan MKII Series LED Pod Light features fine tuned extreme amber LED backlighting to give your truck a subtle yet refined aggressive aurora.
This backlighting color has been custom tuned by the F150LEDs team to match Ford's raptor amber styling color as well as to match our other extreme amber lighting products such as our raptor grill lights and side vent lighting kits etc.
Your Spartan Series II harness has a built-in switch for the back lighting but you can also connect it to your truck's DRL/side marker lighting or, if equipped, your vehicle's AUX panel switches. The use of this backlighting is optional and not required but we have a feeling that you are definitely going to want it!
We pride ourselves on the details and guarantee our custom backlighting color tone & brightness is superior to any other options available anywhere.
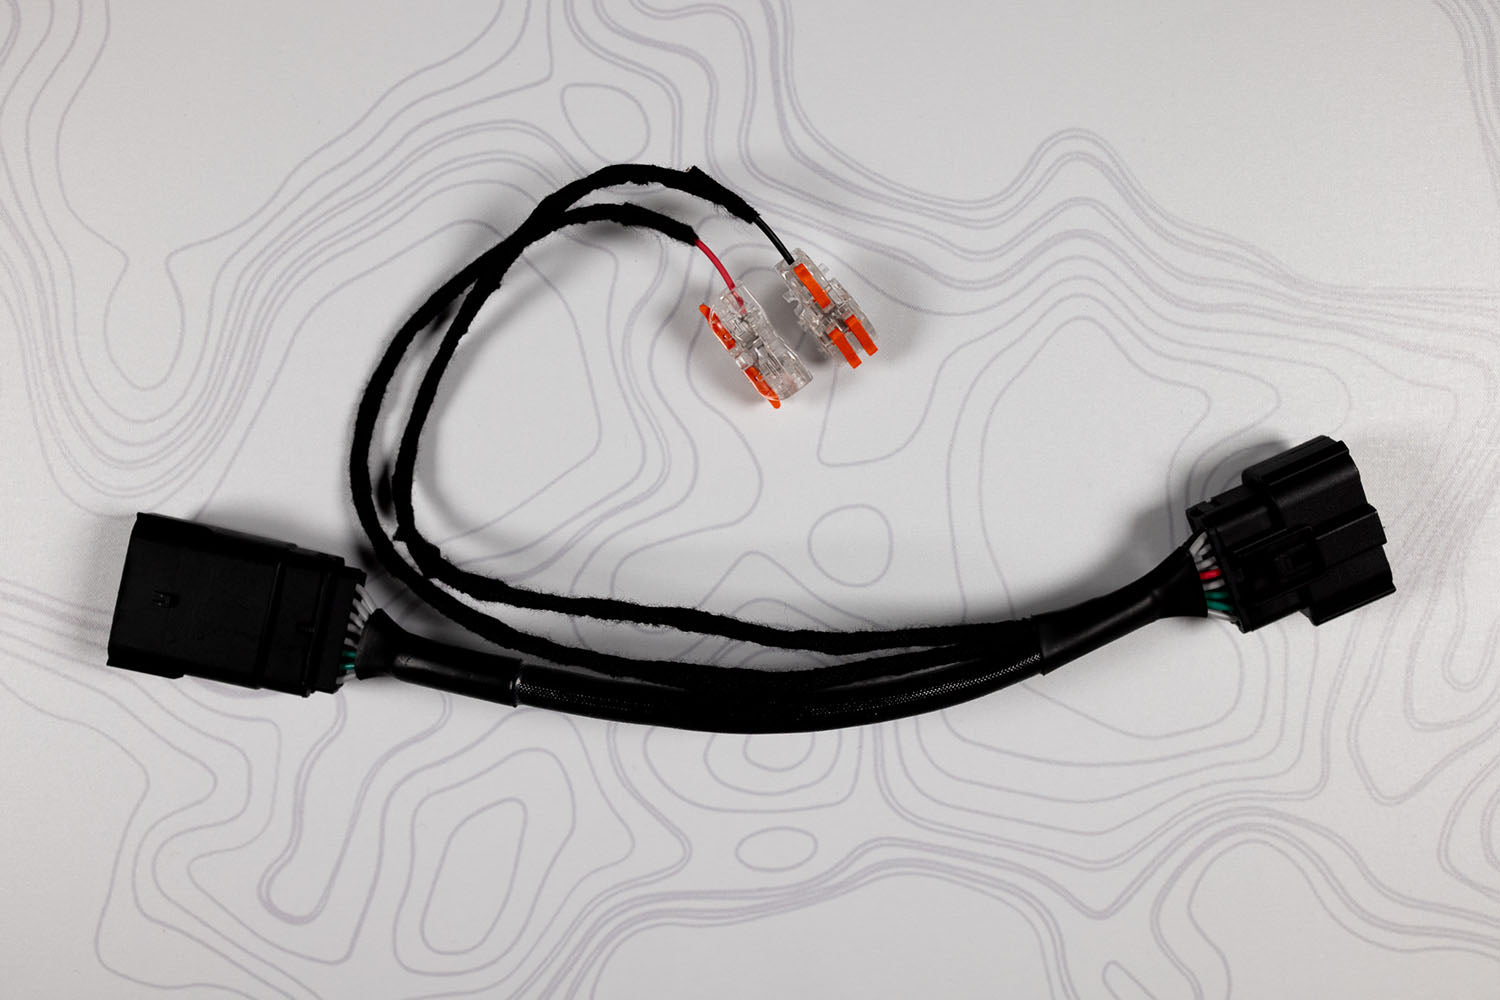
Your Spartan MKII LED Pod lights include a customized tri core connector to mate with any MKII harness you select.
Your Spartan MKII lights are also compatible with Spartan harness upgrades like the Headlight adapter series for backlighting, premium in dash switch upgrades, AUX wire connectors & wireless remote/strobe functionality kits.

What's Included
California Residents - Warning: California's Proposition 65
Warranty - each and every product we offer includes our Full 1-year warranty!
![]() 2017-2020 Ford Raptor Extended Harness Installation Guide
2017-2020 Ford Raptor Extended Harness Installation Guide
![]() Spartan Backlighting Install Guide
Spartan Backlighting Install Guide