My Cart
Your Cart is Currently Empty
PROUDLY AMERICAN OWNED & OPERATED - SERVING SINCE 2014
FREE USA & CANADA SHIPPING OVER $99 + FREE RETURNS!
TEXT US! 706-214-2618 (AUGUSTA, GA USA)
FREE USA & CANADA SHIPPING OVER $99 + FREE RETURNS!


Couldn't load pickup availability
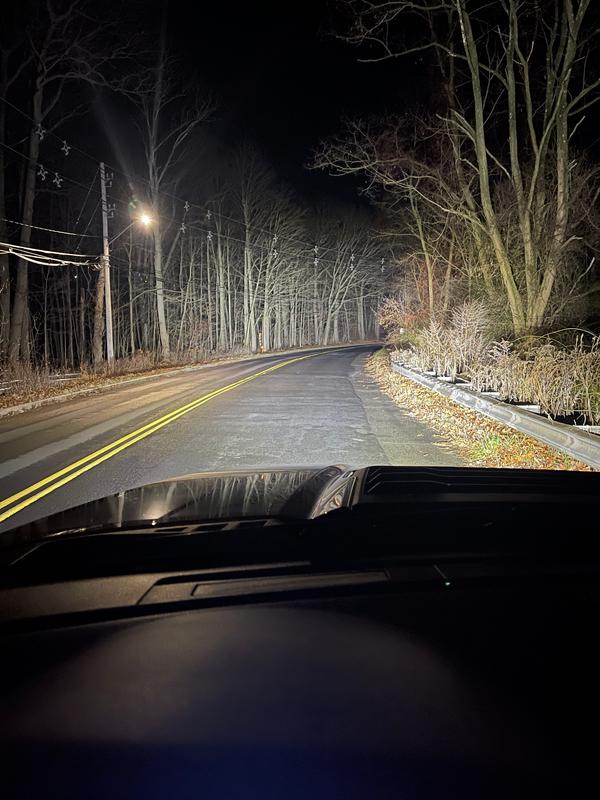
Our Paladin series LED bars to utilize 5W CREE XTE LEDs, HPO (Hyper Paladin Optics), a combination of both flood and spot beams, IP68 weatherproofing, slimline curved design, blackout hardware, custom mounting brackets and matching IP68 heavy-duty harness kits.
Everything you need to stand out & shine brighter with your custom LED bar is included. Install is very easy and we guarantee you will be impressed!
44" Curved Paladin series CREE LED bar
Fully braided custom harness with built-in relay
All necessary mounting hardware & custom brackets
- CREE XTE 5W LEDs, each LED capable of approx 624 TRUE lumens
- TRUE Lumen Output: Multiply LED count by 624
- Voltage:9-60V DC
- TRUE Luminosity output: Approx. 26,400 lumens
- Waterproof rate: IP 68
- Color Temperature: 6500K
- Material:Diecast Aluminum-alloy Construction
- Lens material: PC
- Mounting Bracket: Stainless steel bracket
- Beam Pattern: Paladin Long Range Optic w/ Wide Light Display Arc
- Life rating:50,000 Hrs
- Dustproof shockproof & anti-corrosion
- Light Color Pure White Daylight(6500k)
California Residents - Warning: California's Proposition 65
Each and every product we offer includes our Full 1-year warranty!


 i
i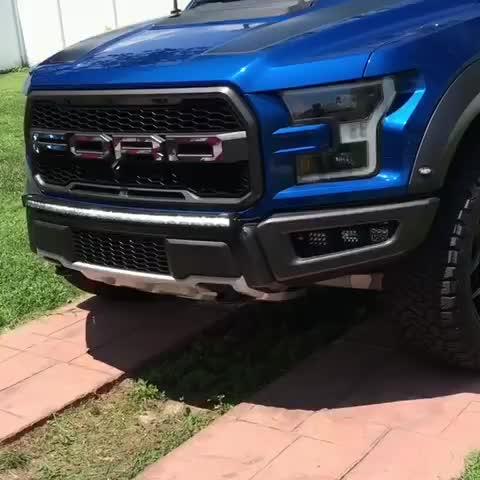 i
i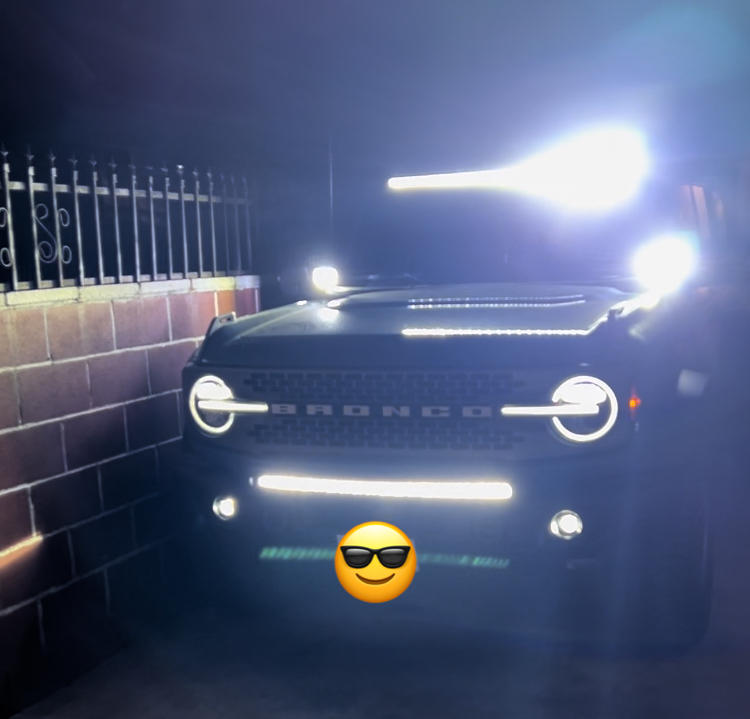 i
i i
i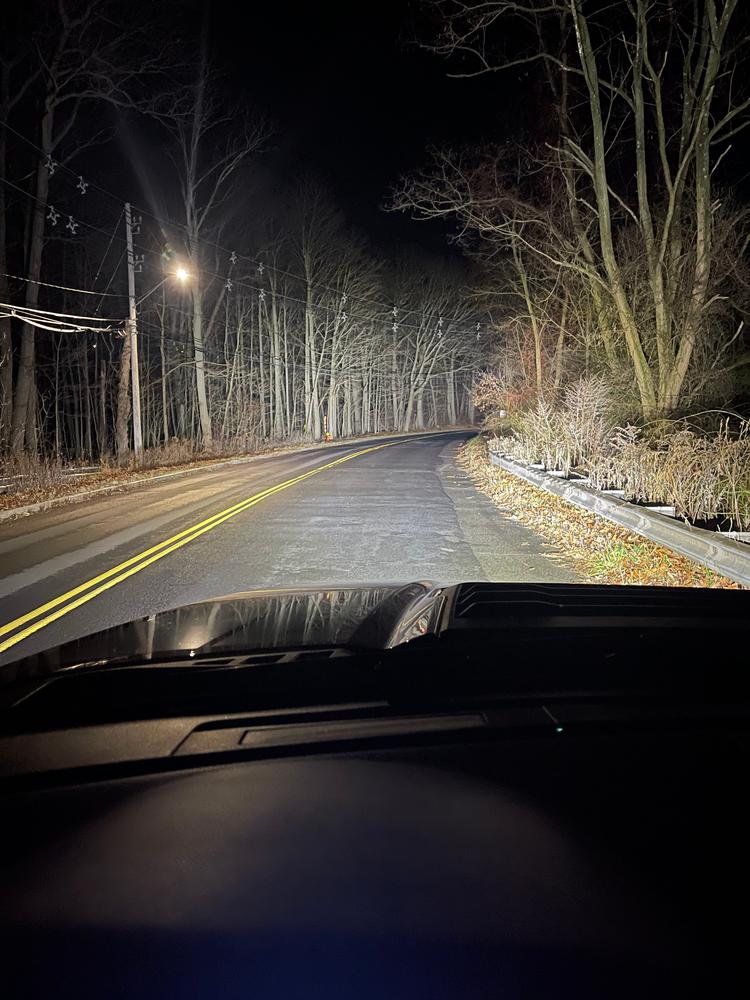 i
i i
i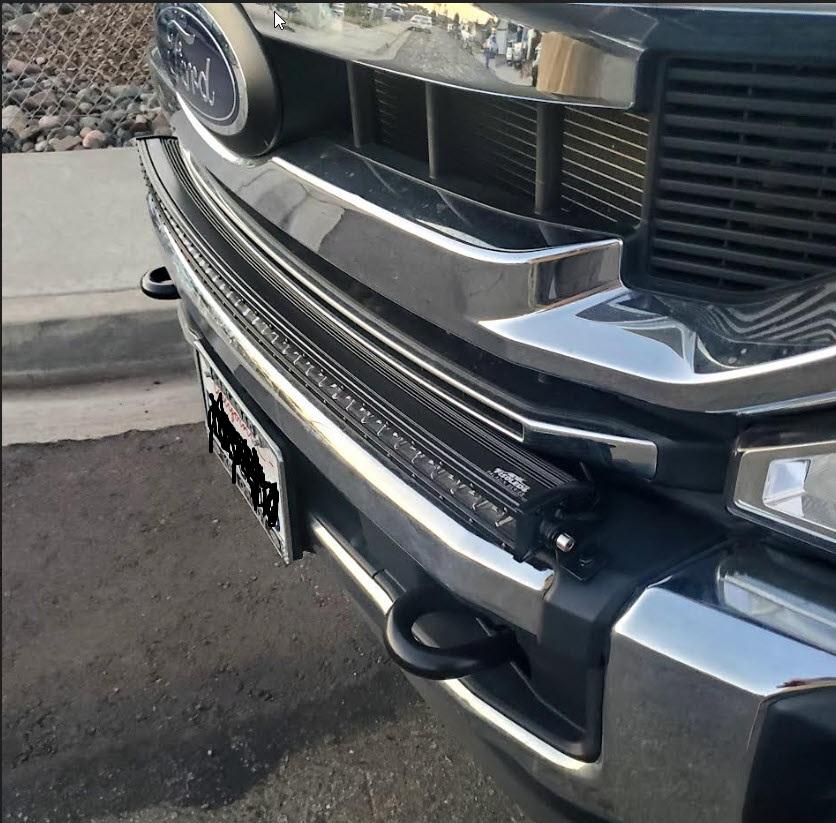 i
i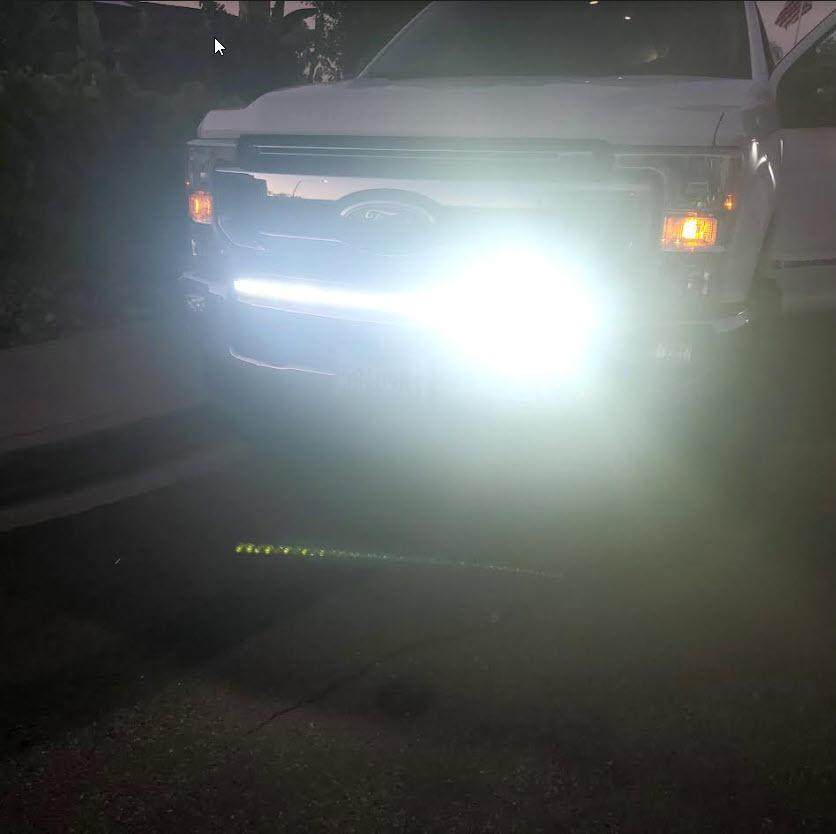 i
i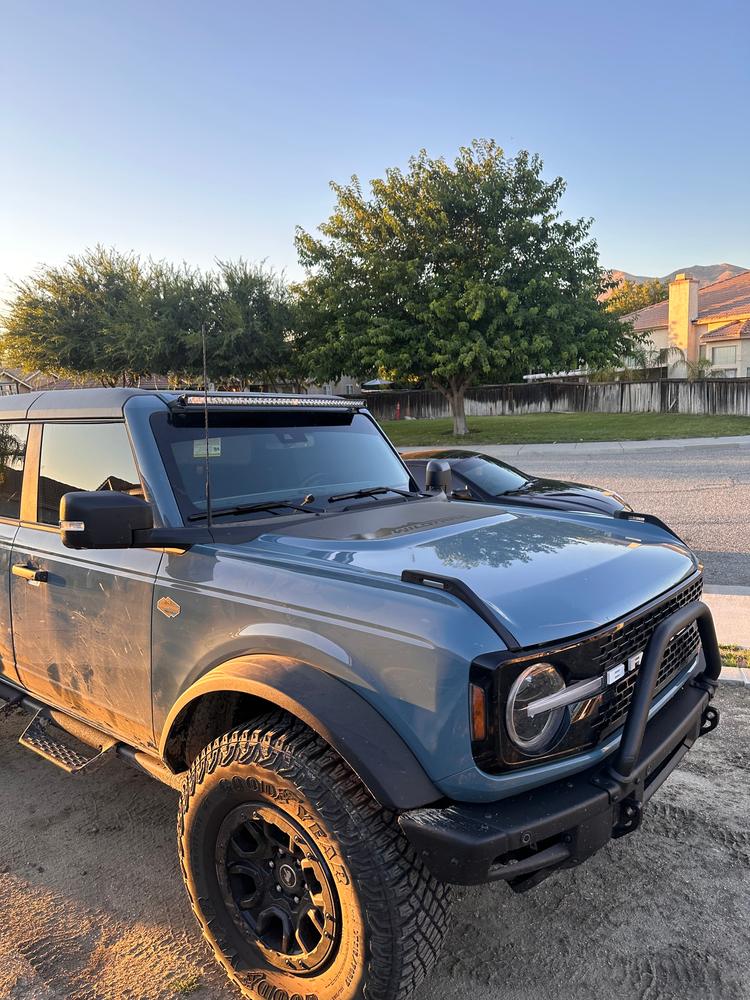 i
iThank you for submitting a review!
Your input is very much appreciated. Share it with your friends so they can enjoy it too!
Had my 6 year old nephew help on the install and he could’ve done it alone! Super easy from start to finish! Light bar works great!
The product is well made and fairly easy to install. I had to contact customer service, and they were very responsive and helpful. I love companies like this.

2nd one I've owned. The first one died for some reason
*** soon as I received my merchandise I notice the quality and I was completely satisfied with my purchase, installed all my lights and my truck looks amazing, would highly recommend it.
easy to install looks great
Incredibly bright and simple to install.
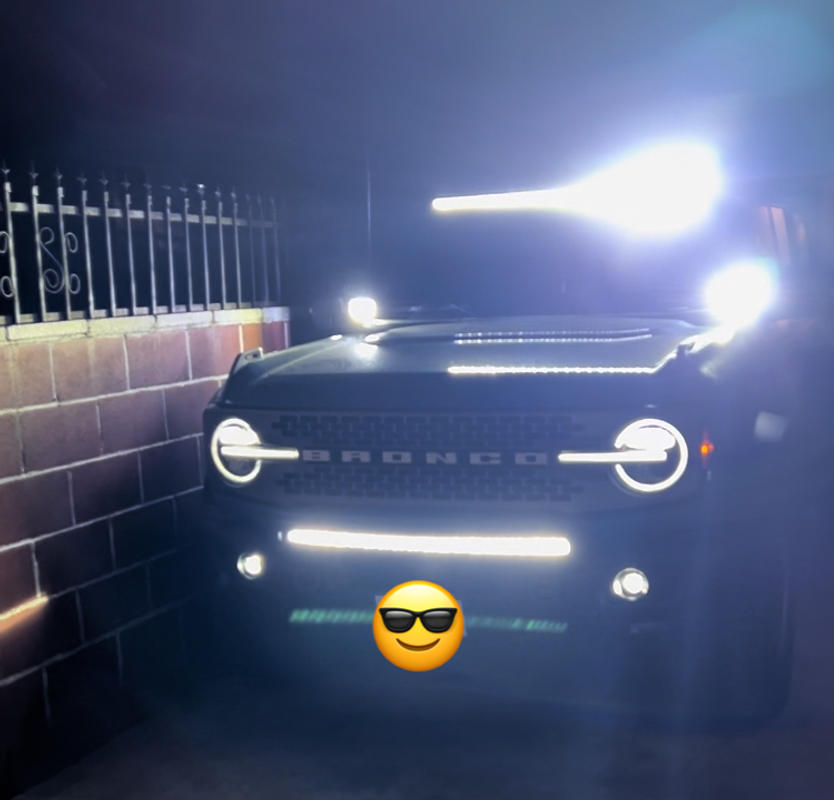
It was so easy to install on my 2024 Ford Bronco. The video was spot on and accurate. I watched it 3 times and I have never attempted anything like this. I already had the switches installed in the Bronco. It is amazing light bar and is blinding bright. That's for a great product. Thank you again, it looks amazing on my truck.
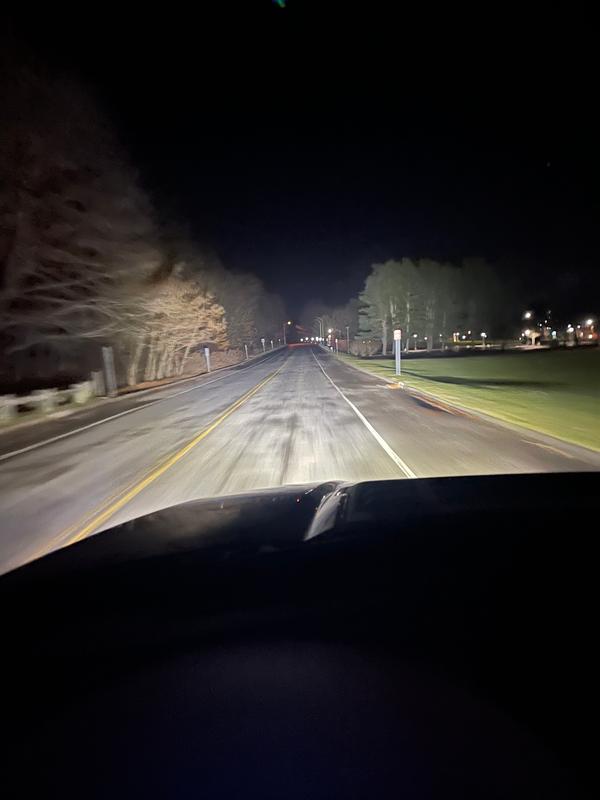
this light is amazing the brightness over and beyond my expectations. turns night time in to day time. Love it and would highly recommend to people���
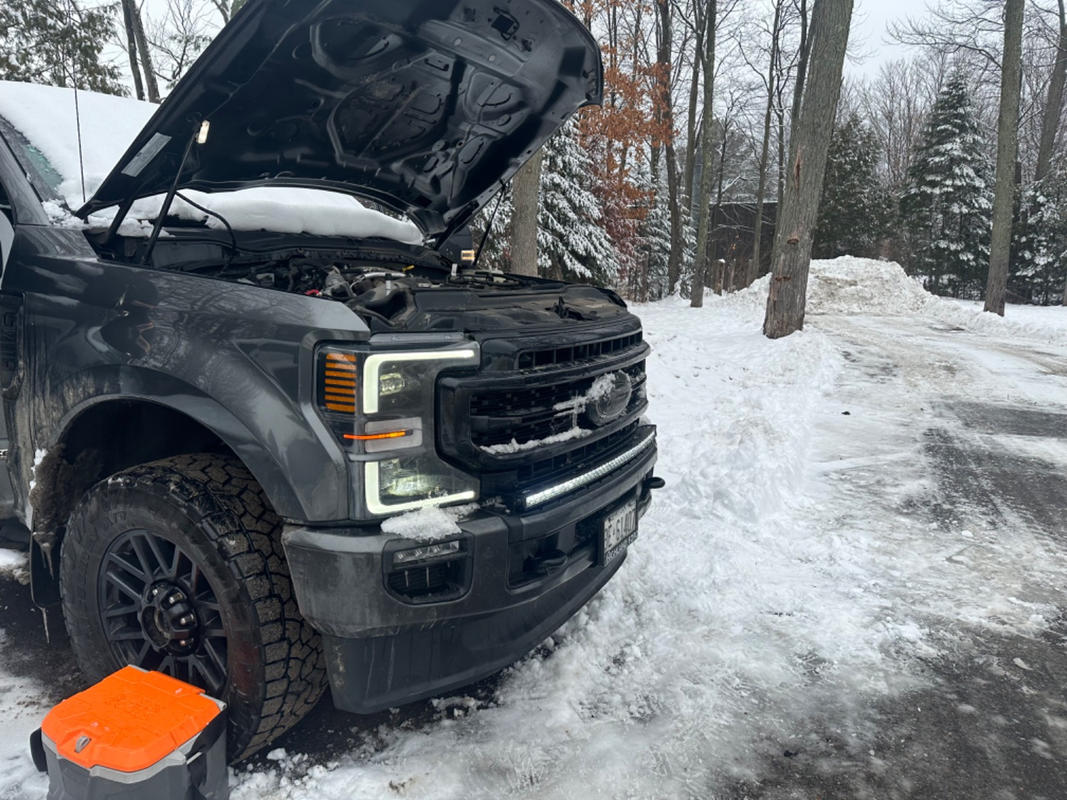
Light bar is awesome, the bar isn't tucked into the grill as far as I’d like but over the 17-22 model year the superdutys have multiple different grills depending on trim and packages so the bar will stick out at different spots on the bumper. Wiring is quality, not cheap Chinese wire, connector is awesome. I soldered and heat shrink the signal wire to the output wire of aux fuse panel. If shipping to Canada you’ll have to pay duties and brokerage fee on retail value of light regardless of you get the bar on sale or not.
this light is amazing and bright as ****. took an hr to install the only con is that they should use a locknut or airplane nut so it can never vibrate loose besides that amazing love it